我家的NAS是威联通的TS-h973AX,使用的CPU是Ryzen V1500B,没有核显,所以运行jellyfin遇到转码和提取图片只能靠CPU硬抗,但是这CPU也不是什么性能强劲的CPU,所以每次一旦导入新的番剧进去,就听见身后的风扇声要转半天。
前阵子突然发现rffmpeg这个仓库,其核心思想是用ffmpeg的参数劫持走,然后使用ssh远程调用其他服务器上的ffmpeg,就可以利用其他服务器上的核显进行硬件加速了。
这里简单记录一下部署过程
0x00 前提准备
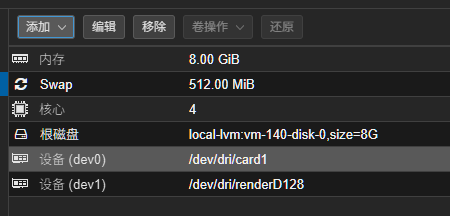
需要有一台带有显卡的服务器,如果是虚拟机需要做显卡虚拟化或者直通,我使用的是pve的lxc容器,不需要倒腾显卡虚拟化或者直通。
0x01 创建lxc容器
由于jellyfin官方的docker镜像使用debian作为基础镜像,所以也推荐使用debian作为lxc的基础镜像,正常装好系统后将显卡传递给容器
并且给予当前容器特权,并且启用nfs挂载的功能

0x02 检查lxc容器内能否访问到显卡
linux下可以直接使用VA-API访问硬件加速,不需要区分显卡单独装驱动
安装vainfo和va显卡驱动
apt install vainfo va-driver
然后执行vainfo
应当可以得到类似于下面的输出,根据VAEntrypointEncSlice可以得到支持的编码器,其余是支持的解码器,比如我这颗7900的核显就只支持AV1的解码,不支持编码
root@rffmpeg:~# vainfo
error: can't connect to X server!
libva info: VA-API version 1.17.0
libva info: Trying to open /usr/lib/x86_64-linux-gnu/dri/radeonsi_drv_video.so
libva info: Found init function __vaDriverInit_1_17
libva info: va_openDriver() returns 0
vainfo: VA-API version: 1.17 (libva 2.12.0)
vainfo: Driver version: Mesa Gallium driver 22.3.6 for AMD Radeon Graphics (gfx1036, LLVM 15.0.6, DRM 3.57, 6.8.4-2-pve)
vainfo: Supported profile and entrypoints
      VAProfileH264ConstrainedBaseline: VAEntrypointVLD
      VAProfileH264ConstrainedBaseline: VAEntrypointEncSlice
      VAProfileH264Main               : VAEntrypointVLD
      VAProfileH264Main               : VAEntrypointEncSlice
      VAProfileH264High               : VAEntrypointVLD
      VAProfileH264High               : VAEntrypointEncSlice
      VAProfileHEVCMain               : VAEntrypointVLD
      VAProfileHEVCMain               : VAEntrypointEncSlice
      VAProfileHEVCMain10             : VAEntrypointVLD
      VAProfileHEVCMain10             : VAEntrypointEncSlice
      VAProfileJPEGBaseline           : VAEntrypointVLD
      VAProfileVP9Profile0            : VAEntrypointVLD
      VAProfileVP9Profile2            : VAEntrypointVLD
      VAProfileAV1Profile0            : VAEntrypointVLD
      VAProfileNone                   : VAEntrypointVideoProc
0x03 在转码服务器上安装jellyfin-ffmpeg
首先进入自己的jellyfin的docker,执行/usr/lib/jellyfin-ffmpeg/ffmpeg -version
查看第一行,确认自己jellyfin使用的ffmpeg版本,比如我的是
ffmpeg version 7.0.2-Jellyfin Copyright (c) 2000-2024 the FFmpeg developers
记得使用自己的ffmpeg版本替换最后的jellyfin-ffmpeg7,根据我的测试只要大版本号对上应该就问题不大了
apt -y install curl gnupg
curl -fsSL https://repo.jellyfin.org/ubuntu/jellyfin_team.gpg.key | sudo gpg --dearmor -o /etc/apt/trusted.gpg.d/jellyfin.gpg
echo "deb [arch=$( dpkg --print-architecture )] https://repo.jellyfin.org/$( awk -F'=' '/^ID=/{ print $NF }' /etc/os-release ) $( awk -F'=' '/^VERSION_CODENAME=/{ print $NF }' /etc/os-release ) main" | sudo tee /etc/apt/sources.list.d/jellyfin.list
apt update
apt install jellyfin-ffmpeg7
安装完成后再次执行/usr/lib/jellyfin-ffmpeg/ffmpeg -v debug -init_hw_device vulkan
[AVHWDeviceContext @ 0x62fcad34cec0] Supported layers:
[AVHWDeviceContext @ 0x62fcad34cec0]    VK_LAYER_MESA_device_select
    Last message repeated 1 times
[AVHWDeviceContext @ 0x62fcad34cec0]    VK_LAYER_MESA_overlay
[AVHWDeviceContext @ 0x62fcad34cec0]    VK_LAYER_INTEL_nullhw
[AVHWDeviceContext @ 0x62fcad34cec0]    VK_LAYER_MESA_overlay
[AVHWDeviceContext @ 0x62fcad34cec0] Using instance extension VK_KHR_portability_enumeration
[AVHWDeviceContext @ 0x62fcad34cec0] GPU listing:
[AVHWDeviceContext @ 0x62fcad34cec0]     0: AMD Radeon Graphics (RADV GFX1036) (integrated) (0x164e)
[AVHWDeviceContext @ 0x62fcad34cec0]     1: AMD Radeon Graphics (RADV RAPHAEL_MENDOCINO) (integrated) (0x164e)
[AVHWDeviceContext @ 0x62fcad34cec0]     2: llvmpipe (LLVM 15.0.6, 256 bits) (software) (0x0)
[AVHWDeviceContext @ 0x62fcad34cec0] Device 0 selected: AMD Radeon Graphics (RADV GFX1036) (integrated) (0x164e)
[AVHWDeviceContext @ 0x62fcad34cec0] Using device extension VK_KHR_push_descriptor
[AVHWDeviceContext @ 0x62fcad34cec0] Using device extension VK_EXT_physical_device_drm
[AVHWDeviceContext @ 0x62fcad34cec0] Using device extension VK_EXT_shader_atomic_float
[AVHWDeviceContext @ 0x62fcad34cec0] Using device extension VK_KHR_external_memory_fd
[AVHWDeviceContext @ 0x62fcad34cec0] Using device extension VK_EXT_external_memory_dma_buf
[AVHWDeviceContext @ 0x62fcad34cec0] Using device extension VK_EXT_image_drm_format_modifier
[AVHWDeviceContext @ 0x62fcad34cec0] Using device extension VK_KHR_external_semaphore_fd
[AVHWDeviceContext @ 0x62fcad34cec0] Using device extension VK_EXT_external_memory_host
[AVHWDeviceContext @ 0x62fcad34cec0] Queue families:
[AVHWDeviceContext @ 0x62fcad34cec0]     0: graphics compute transfer sparse (queues: 1)
[AVHWDeviceContext @ 0x62fcad34cec0]     1: compute transfer sparse (queues: 4)
[AVHWDeviceContext @ 0x62fcad34cec0] Using device: AMD Radeon Graphics (RADV GFX1036)
[AVHWDeviceContext @ 0x62fcad34cec0] Alignments:
[AVHWDeviceContext @ 0x62fcad34cec0]     optimalBufferCopyRowPitchAlignment: 1
[AVHWDeviceContext @ 0x62fcad34cec0]     minMemoryMapAlignment:              4096
[AVHWDeviceContext @ 0x62fcad34cec0]     nonCoherentAtomSize:                64
[AVHWDeviceContext @ 0x62fcad34cec0]     minImportedHostPointerAlignment:    4096
[AVHWDeviceContext @ 0x62fcad34cec0] Using queue family 0 (queues: 1) for graphics
[AVHWDeviceContext @ 0x62fcad34cec0] Using queue family 1 (queues: 4) for compute transfers
Successfully parsed a group of options.
此时ffmpeg应当可以找到显卡信息
0x04 使用nfs挂载jellyfin相同的目录结构
具体的挂载方式就不是很好举例了,总之就是要参照自己的jellyfin目录结构,在rffmpeg的服务器上挂载出完全相同的目录结构,比如我的jellyfin容器使用/media/videos目录存放视频文件,在jellyfin容器上对应的是nas的/videos目录,那我就需要把nas上的/videos目录也挂载到rffmpeg服务器的/media/videos,配置目录和缓存目录也是同理
这里贴一下我的fstab文件举个栗子
nas.home.933.moe:/videos /media/videos  nfs     defaults        0       0
nas.home.933.moe:/vm-ssd/jellyfin/config /config        nfs     defaults        0       0
nas.home.933.moe:/vm-ssd/jellyfin/cache /cache  nfs     defaults        0       0
如果在挂载nfs时遇到了permission denied的话,记得回去看一下眼lxc的nfs权限有没有给
0x05 生成ssh密钥对
ssh-keygen
cat ~/.ssh/id_rsa.pub >> ~/.ssh/authorized_keys
然后找到~/.ssh/id_rsa文件,复制到jellyfin的config目录中,比如/config/rffmpeg/id_rsa,并且给与600的权限
到此为止rffmpeg的服务器准备就算完成了,该对jellyfin做亿点微小的改造了
0x06 在jellyfin里安装rffmpeg
可以参考或者直接使用我打包好的docker镜像https://github.com/bangbang93/jellyfin
FROM bitnami/git AS git

WORKDIR /rffmpeg
RUN git clone https://github.com/joshuaboniface/rffmpeg --depth 1 .

FROM jellyfin/jellyfin

RUN apt-get update && apt-get install -y fonts-noto-cjk fonts-noto-cjk-extra python3-yaml python3-click openssh-client && \
  apt clean && \
  rm -rf /var/lib/apt/lists/*

COPY --from=git /rffmpeg/rffmpeg /usr/local/bin/rffmpeg
COPY --from=git /rffmpeg/rffmpeg.yml.sample /etc/rffmpeg/rffmpeg.yml.sample
RUN chmod +x /usr/local/bin/rffmpeg && \
  ln -s /usr/local/bin/rffmpeg /usr/local/bin/ffmpeg && \
  ln -s /usr/local/bin/rffmpeg /usr/local/bin/ffprobe && \
  ln -s /config/rffmpeg.yml /etc/rffmpeg/rffmpeg.yml
打包时有一个变量,最后一个ln -s前面的参数需要改成jellyfin配置目录
0x07 编辑rffmpeg配置文件
在jellyfin的配置目录里新建一个rffmpeg.yml,内容粘贴https://github.com/joshuaboniface/rffmpeg/blob/master/rffmpeg.yml.sample,比如我的路径就是nas上的/vm-ssd/jellyfin/config/rffmpeg.yml
主要留意几个配置即可
- rffmpeg.logging.datedlogfiles=true
按照日期分割日志,调试完成后可以关闭日志 - rffmpeg.logging.datedlogdir="/config/log"
日志写入的路径 - rffmpeg.directories.state="/config/rffmpeg"
rffmpeg数据库路径,需要放在能够持久化保存的地方 - rffmpeg.directories.persist="/tmp"
ssh链接保持的sock文件存放的地方 - rffmpeg.directories.owner="root"
需要和jellyfin的进程用户保持一致 - rffmpeg.remote.user="root"
ssh连接rffmpeg服务器时使用的用户 - rffmpeg.remote.args=["-i", "/config/rffmpeg/id_rsa"]
指定ssh连接使用的密钥
配置完成后执行rffmpeg init应当能够成功初始化rffmpeg的数据库,用于保存远程服务器的信息。
然后使用rffmpeg add --weight 1 rffmpeg添加服务器,最后一个参数就是服务器的地址(我有内网dns,所以只需要写一个单独的主机名即可)。
添加成功后再执行/usr/local/bin/ffmpeg -version注意不是jellyfin自带的ffmpeg(/usr/lib/jellyfin-ffmpeg/ffmpeg),此时应该能够输出远程ffmpeg的版本。再执行/usr/local/bin/ffmpeg -v debug -init_hw_device vulkan应该就能得到和远程一样的显卡信息了。如果此时有报错,可以将配置文件里的rffmpeg.logging.debug=true打开,然后根据日志信息检查服务器哪里连接有问题。
0x08 让jellyfin默认调用rffmpeg
添加这个环境变量,重新创建jellyfin的容器JELLYFIN_FFMPEG=/usr/local/bin/ffmpeg,待启动成功后再用上面的方法检查一次,确保没有哪里把配置信息放到了非持久化的目录里。
确认没问题后就可以愉快得开启jellyfin的硬件加速了,一共有两处
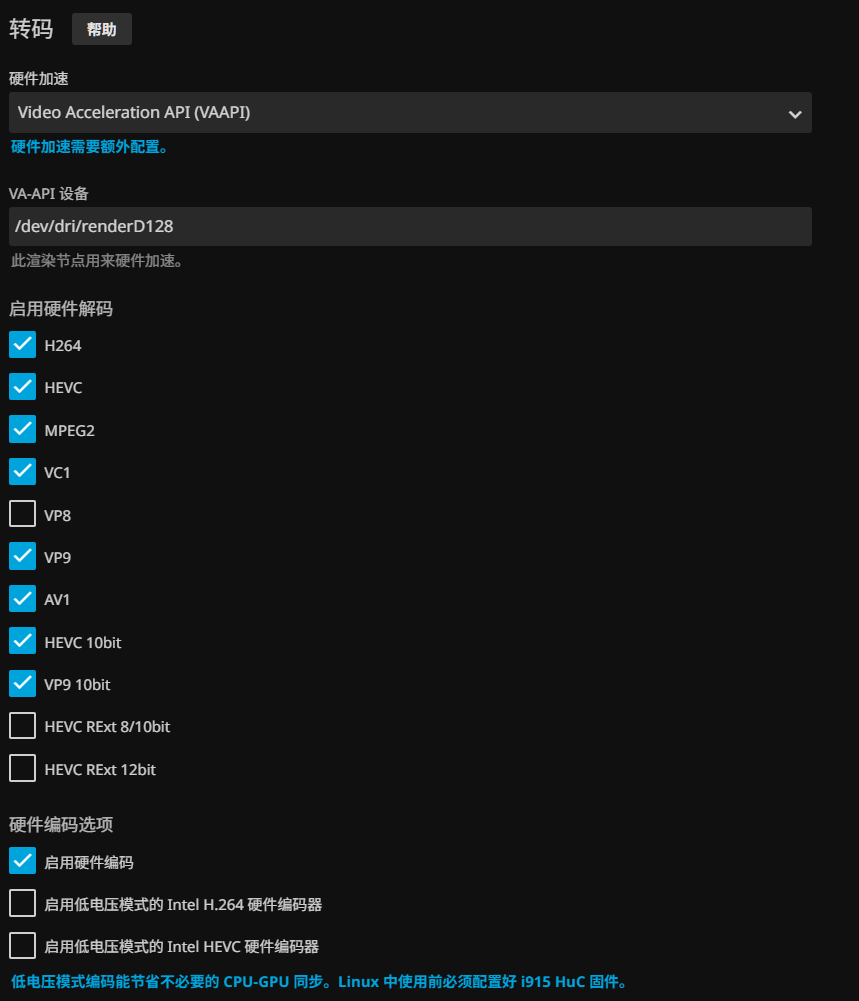
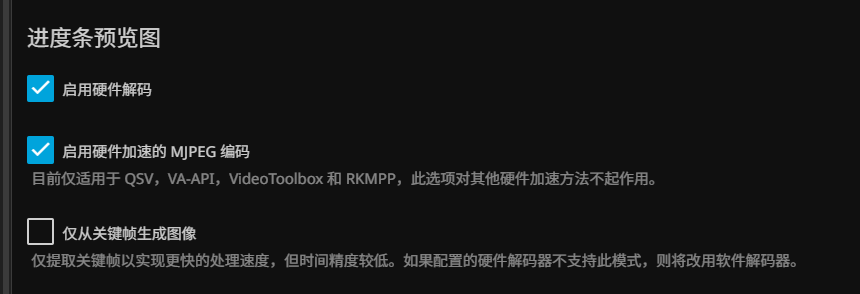
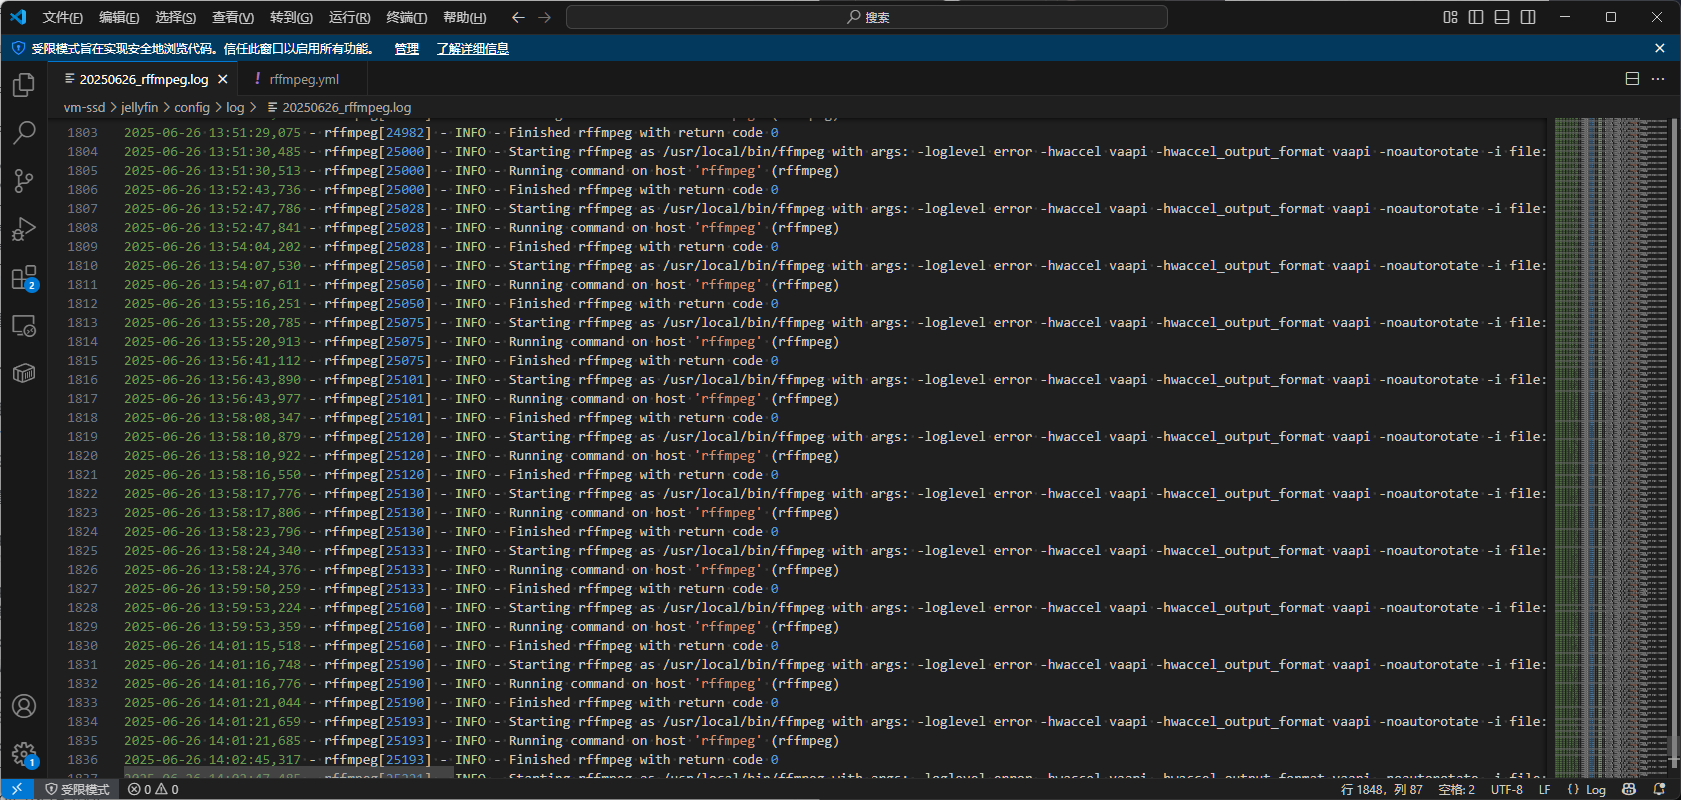
最后等它开始干活,应当就可以在远程服务器上看到ffmpeg进程了
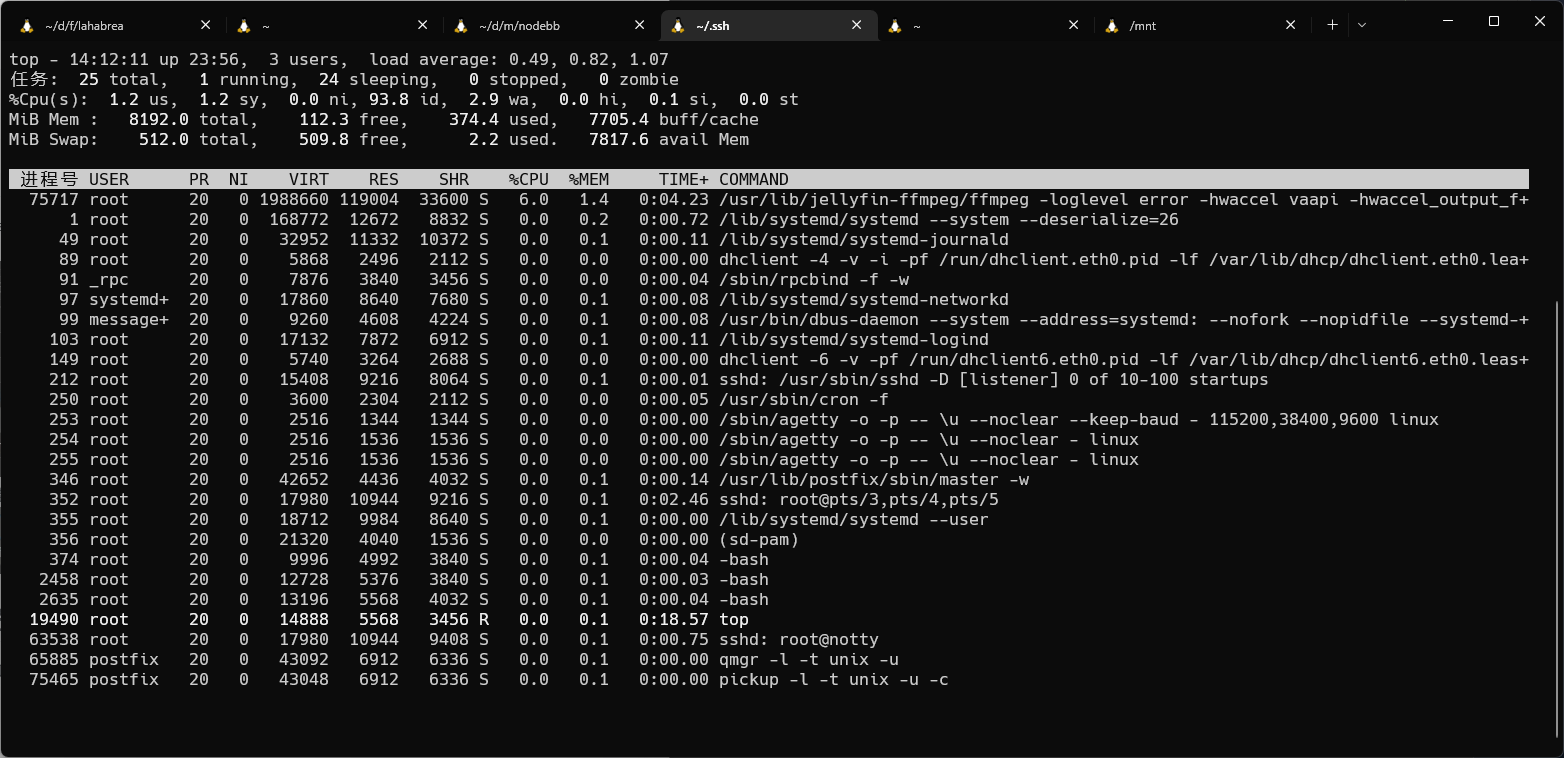
最后盯一会儿日志,只要都是return code 0,那就是能用